Disclaimer: I apologize in advance for this post being somewhat/really long as well as lacking in pictures. Considering how many chili and dessert entries there were, you should be thankful that this post only contains 7 recipes. Regarding the pictures, well, when I arrived at this event, I was late and hungry… enough said.
So to get on with it…
This past weekend was the Second Annual Mike and Anne Galdo Classic Chili Cook-off and Dessert “Back-off”. What is this event, you ask? I think it’s pretty self-explanatory, it was a smallish gathering among friends… not any sort of sponsored event so don’t go googling it, you won’t find anything. The Galdo’s are our dear friends who, about a year ago, had to move from DC to Del Rio , TX
Despite his shortcomings with a keyboard, Dave pulled together an awesome group of people for an awesome event, and he really must get a shout-out for his organization skills. Ballots were printed ahead of time, two sets for both the cook-off and the “back-off”, with lines to enter your 1st place, 2nd place, and 3rd place chili and dessert with points awarded as 3, 2, or 1, respectively.
The Chili Cookoff:
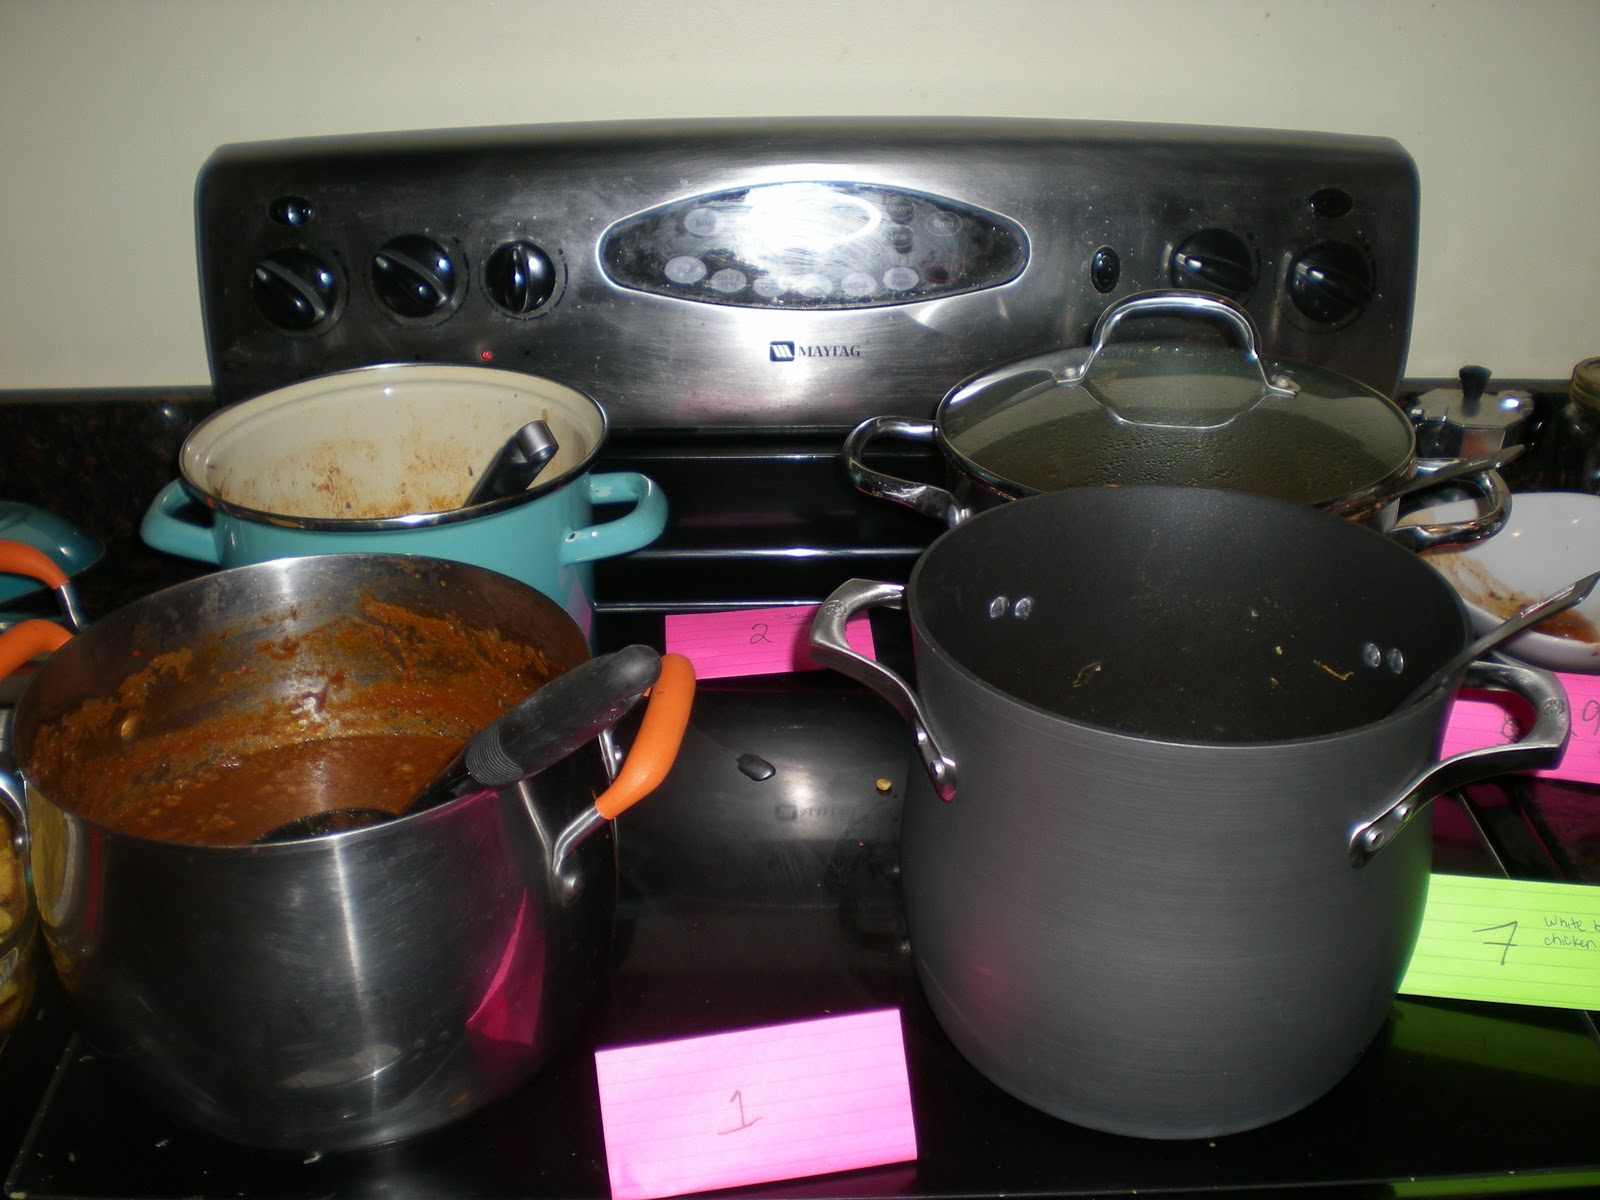 |
| The inside chilis for those who claimed a burner early enough... mine was 7! |
 |
| Outside chilis in crockpots... this wasn't even all of them! |
I believe there were about 12-14 chili entries, each assigned a number with the intent for anonymity. This somewhat worked as there was an overwhelming number of pork chili entries, but when only one couple out of your group of friends doesn’t eat meat, it was quite obvious to whom the vegetarian chili belonged. Regarding my chili, I will come right out and say it: it did not place in the Top 3. I’m okay with that, though… really… I didn’t cry myself to sleep that night… But mine was the only chicken chili entry, and I eavesdropped on some of the voters that I didn’t know talking about how much they liked it. I really went into this competition not expecting to win, as many of the voters were male, and let’s be honest, they want lots of MEAT. My goal was really just to enter an alternative to traditional chili that was healthy as well. (Note from Michelle: I always poach my chicken as I describe in the directions for this chili, so feel free to use this method for other recipes that call for cooked/poached chicken… it’s very versatile!)
White Bean Chicken Chili
Ingredients
1 pound chicken (approximately 2 breasts)
Penzeys Bavarian seasoning (any poultry seasoning or herbs will do)
2 tablespoons vegetable oil
1 onion, chopped
2 cloves garlic, minced
1 (14.5 ounce) can chicken broth
1 pound fresh tomatillos, peeled and chopped
1 (16 ounce) can diced tomatoes
1 (7 ounce) can diced green chiles
1/2 teaspoon dried oregano
1/2 teaspoon ground coriander seed
1/4 teaspoon ground cumin
1 can white corn
1 (15 ounce) can white beans
1 pinch salt and black pepper to taste
Directions
1. The night before or earlier in the day: Place chicken breasts in a pot, fill with lukewarm water, and sprinkle in some Penzeys Bavarian seasoning. Heat on medium high until the water is boiling, let boil for 2 minutes, then turn the heat off and let the chicken breasts sit in the warm water for 20 minutes. Drain, and when the chicken breasts are cool enough to handle, shred into pieces sized to your liking. Set aside if ready to use, or in the refrigerator until you need it.
2. Heat oil over medium heat, and cook onion and garlic until soft (about 5 minutes).
3. Stir in broth, tomatillos, tomatoes, chilies, and spices. Bring to a boil over medium high heat, then simmer for 10 minutes on medium low heat.
4. Add corn, chicken, and beans; simmer 5 minutes. Season with salt and pepper to taste.
*Original recipe can be located here.
As for the outcome of the cook-off, it came right down to the wire. Two of the chili’s had the exact same number of points. Our judges then counted up the number of 1st place votes… same. Thus, the number of 2nd place votes determined our winner, Eric’s Chili! (I would like to point out that my votes were honest and based solely on how good each chili was, and Eric’s was on my list. His was the only one with andouille sausage and it was killer.)
Eric’s Chili
Ingredients
1/2 cup yellow onion, chopped
1 cup green bell pepper, chopped
1/2 cup celery, chopped
1/2 cup chopped garlic
1 pound ground beef
1 pound Veron's Andouille Sausage (from Louisiana
1 can Red Kidney Beans
1 can Plain Tomato Sauce
1 jar Tostitos Salsa - Medium
McCormick's Season-all
Worcestershire Sauce
Chili powder
Olive Oil
(Note from Eric: It should be noted that I don't typically measure my seasoning precisely, and rely on my personal taste to determine the correct amount of Season-All or Chili Powder. For spicier chili, use jar of "Hot" Tostitos Salsa. For milder chili, use jar of "Mild Tostitos Salsa".)
Directions
Put olive oil in the bottom of the pot, place on medium-high heat. Once the oil is ready, add onions. Cook until translucent. Add celery, bell pepper, and garlic. Cook for 5-10 minutes until peppers are soft. Add in Andouille sausage, chopped into bite sized pieces. Cook for 10 minutes, drain excess water/grease from pot if desired. Add in 1 lb ground beef. Spinkle Season-all on meat generously. Add Worcestershire Sauce to improve beef flavor. Cook for 10-15 minutes until all meat is browned. Reduce heat to medium-low. Add Kidney Beans and jar of Tostitos Salsa. Stir. Add in additional Tomato Sauce until desired consistency is reached. For a chunkier chili, add less tomato sauce. For a more sauce-heavy chili, add an additional 1/2 can of Tomato Sauce. Add Season-all to achieve correct level of saltiness. Add chili powder (I add about 2-3 tbsp) until the right chili taste is achieved. Cover pot with lid, reduce heat to low and allow to slow-cook for at least one hour. Stir every 20 minutes to ensure the bottom is not burning.
Feeds approximately 10-12 people.
As I mentioned in my welcome post, I may love seafood more than meat. So I was very excited when it was announced that 2nd place was won by Tarcy’s Seafood Chili!
Tarcy’s Seafood Chili
Ingredients
1.5 pound peeled and deveined shrimp (use fresh/uncooked if available, frozen is fine though)
1.5 pound scallops (You may want to cut them into smaller pieces)
1/2 pound Halibut, remove skin and cut into bite size cubes
2 1/2 tablespoons chili powder
1 tablespoon ground cumin
4 tablespoons chopped fresh cilantro
8 garlic cloves, pressed
3 Serrano chilies, finely chopped (leave the seeds in!)
2 tablespoons olive oil
1 onion, chopped
1 red bell pepper, chopped
1 yellow bell pepper, chopped
1/4 teaspoon ground cinnamon
1/4 teaspoon paprika
1/2 teaspoon cayenne pepper
1 tablespoon Harissa (from Cava)
2 cups Seafood stock
1 14-oz can diced fire-roasted tomatoes
1 14-oz can red kidney beans, drained and rinsed
Kosher salt to taste
Directions
1. Combine the shrimp, scallops, 1/2 tablespoon chili powder, 1/2 teaspoon cumin, 2 tablespoon cilantro, 4 garlic cloves, 2 chilies and 1 tablespoon olive oil in a bowl. Cover and set aside in the fridge for about one hour.
2. Heat the remaining oil in soup pot/dutch oven.
3. Add the onion, remaining garlic, remaining chili and the bell peppers with a pinch of kosher salt. Cook over low heat until softened.
4. Add the remaining spices. Cook another 5 minutes or so.
5. Add the broth and tomatoes. Partially cover and simmer 25 minutes.
6. Add the beans and fish to the dish. Cover and cook 30 minutes.
*Inspiration for this recipe can be located here.
The Dessert “Back-off”:
 |
| All of the desserts (and some chili toppings)! |
The competition was not as fierce, but equally delicious and with its own set of complications (more on that below). However, the clear 1st place winner was John’s Scenic City Peanut Butter Pie!
John’s Scenic City
Pie Ingredients
4 ounces cream cheese, room temperature
1 cup powdered sugar (Confectioner's XXXX)
8 ounces whipped topping (Cool Whip)
1 cup peanut butter
1/2 teaspoon vanilla
9 inch chocolate Oreo pie crust
Chocolate Glaze Topping Ingredients
2 ounces chocolate chips
1/4 cup whipping cream, whipped
1 teaspoon corn syrup (Karo)
Pie Directions
Whip the cream cheese until fluffy. Add powdered sugar, and mix well. Add vanilla. Fold in whipped topping and peanut butter; blend well. Spoon mixture into crust and smooth the top as flat as possible. Place in refrigerator while making topping.
Chocolate Glaze Topping Directions
In a small saucepan, over low heat, melt chocolate chips. Stir in whipped cream and corn syrup. Stir until smooth then remove from heat. Gently glaze over the pie. Place in refrigerator and chill for at least two hours before serving.
Now here’s where those complications I mentioned above arise. Now Dave had clearly stated the rules ahead of time, that if you chose to enter more than one dessert, your scores would be averaged (thus, it’s not really your dessert that’s the winner, but you). I knew this. But I made my awesome pumpkin cupcakes with cream cheese frosting last year (prior to the existence of the dessert competition), and was afraid of knock-offs (it is October after all) and/or that pumpkin wouldn’t appeal to the masses. But I really wanted to make them because I wanted to eat them. So I decided try and call my entry “cupcakes” and also made chocolate cupcakes with chocolate ganache. This backfired. I was assigned two numbers for each of my two types of cupcakes.
I’ll cut to the chase. My pumpkin cupcakes won the 2nd highest number of votes (yay, me!) and weren’t too far behind the peanut butter pie. But, as Dave announced during the awards ceremony, my double chocolate cupcakes were “dead last”, thus kicking me out of the competition:( Whatever, I won in my heart. And it’s not like my double chocolate cupcakes didn’t receive any votes (chocolate lovers, this recipe is for you… and p.s. they are very rich!).
 |
| My cupcakes:) |
Michelle’s Pumpkin Cupcakes with Cream Cheese Frosting
Pumpkin Cupcake Ingredients
1 1/2 cups flour
1/2 teaspoon salt
1 cup sugar
1 teaspoon baking soda
1 cup pumpkin puree
1/2 cup vegetable oil
2 eggs, beaten
1/4 cup water
1/4 teaspoon nutmeg
1 teaspoon cinnamon
Cream Cheese Frosting Ingredients
4 tablespoons unsalted butter, room temperature
6 ounces cream cheese, room temperature
4 cups confectioners' sugar, sifted
1/4 teaspoon pure vanilla extract
(Note from Michelle: I actually substituted Madagascar Bourbon vanilla powder for the extract. 1:1 ratio and the result is the same.)
4 cups confectioners' sugar, sifted
1/4 teaspoon pure vanilla extract
(Note from Michelle: I actually substituted Madagascar Bourbon vanilla powder for the extract. 1:1 ratio and the result is the same.)
Pumpkin Cupcake Directions
Preheat oven to 350. Sift together the flour, salt, sugar, and baking soda. In a separate bowl, combine the pumpkin, oil, eggs, water, and spices. Pour into the bowl w/ dry ingredients and mix just until all just combined. Line a standard muffin pan with 12 baking liners and lightly spray with Pam. Fill each muffin liner about 2/3 full and so that all 12 are about even. Bake 20 to 22 minutes until a toothpick inserted into one of the muffins comes out clean. Remove from pan, cool on rack.
Preheat oven to 350. Sift together the flour, salt, sugar, and baking soda. In a separate bowl, combine the pumpkin, oil, eggs, water, and spices. Pour into the bowl w/ dry ingredients and mix just until all just combined. Line a standard muffin pan with 12 baking liners and lightly spray with Pam. Fill each muffin liner about 2/3 full and so that all 12 are about even. Bake 20 to 22 minutes until a toothpick inserted into one of the muffins comes out clean. Remove from pan, cool on rack.
(Note from Michelle: If you prefer pumpkin muffins, just stop here!)
Cream Cheese Frosting Directions
1. Place butter and cream cheese in the bowl of an electric mixer fitted with the paddle attachment; beat at medium speed until well combined, about a minute.
2. Add sugar, one cup at a time, scraping down the sides of the bowl as needed.
3. Add extract/powder, beat at medium-high speed for about 2 minutes to get light and fluffy frosting.
4. Frost cupcakes either with a knife, or for a cleaner look, with a piping bag and tip. (I used a #12 round tip.)
5. Add sprinkles if you want a little something extra.
Cupcake Ingredients
1 1/4 cups flour, sifted
1/2 teaspoon baking soda, sifted
1/4 teaspoon salt
8 tablespoons (4 ounces) unsalted butter, at room temperature
1 1/4 cups sugar
2 large eggs, at room temperature
1 1/4 teaspoons vanilla extract, preferably Madagascar
1 cup whole milk, at room temperature
1/2 cup cocoa powder, sifted (E. Guittard , can be found at Sur La Table)
Ganache Ingredients
1/2 cup heavy cream
1 cup semisweet chocolate chips (E. Guittard , can be found at Sur La Table)
Cupcake Directions
Preheat the oven to 350 degrees. Line a standard cupcake pan with 12 baking cups, and a second pan with 6 baking cups.
Sift together the flour, baking soda and salt on a sheet of wax paper or parchment paper.
Sift together the flour, baking soda and salt on a sheet of wax paper or parchment paper.
Place the butter in the bowl of a stand mixer or hand-held electric mixer. Beat on medium speed until fluffy. Stop to add the sugar; beat on medium speed until well incorporated.
Add the eggs one at a time, mixing slowly after each addition.
Combine the vanilla extract and milk in a large liquid measuring cup.
Reduce the speed to low. Add one-third of the flour mixture to the butter mixture, then gradually add one-third of the milk mixture, beating until well incorporated. Add another one-third of the flour mixture, followed by one-third of the milk mixture. Stop to scrape down the bowl as needed. Add the remaining flour mixture, followed by the remaining milk mixture, and beat just until combined.
Add the cocoa powder, beating (on low speed) just until incorporated.
Use a standard-size ice cream scoop to fill each cupcake paper with batter, so that the wells are two-thirds full. Bake for 18 to 20 minutes (start checking at 15 minutes) or until a toothpick inserted into the center of a cupcake comes out clean. Transfer the pan to a wire rack to cool completely.
Ganache Directions
Combine the heavy cream and chocolate in a medium heatproof bowl. Fill a medium saucepan with an inch or two of water and place over medium-low heat. Place the bowl over the saucepan and let the mixture melt, stirring until it is shiny and smooth.
Remove the bowl of chocolate ganache from the saucepan; let it cool slightly, for 2 to 3 minutes. Working with 1 cupcake at a time, carefully dip each cupcake top in the warm ganache, twisting your wrist as needed to make sure the cupcake top gets completely coated. To prevent drips, quickly turn the cupcake right side up and place on the wax paper. Allow the ganache to set for 5 minutes before serving.
*Original recipe can be located here.
Therefore, 2nd place and a big hug goes to the lovely Jaimie, for her “healthy” caramel cake!
Jaimie’s Caramel Cake
Cake Ingredients
1 tablespoon all-purpose flour
1 1/2 cups granulated sugar
1/2 cup butter or stick margarine, softened
2 large eggs
1 large egg white
2 1/4 cups all-purpose flour
2 1/2 teaspoons baking powder
1/2 teaspoon salt
1 1/4 cups fat-free milk
2 teaspoons vanilla extract
Frosting Ingredients
1 cup packed dark brown sugar
1/2 cup evaporated fat-free milk
2 1/2 tablespoons butter or stick margarine
2 teaspoons light-colored corn syrup
Dash of salt
2 cups powdered sugar
2 1/2 teaspoons vanilla extract
Cake Directions
Preheat oven to 350°. Coat 2 (9-inch) round cake pans with cooking spray; line bottoms with wax paper. Coat wax paper with cooking spray; dust with 1 tablespoon flour.
Beat granulated sugar and 1/2 cup butter at medium speed of a mixer until well-blended (about 5 minutes). Add eggs and egg white, 1 at a time, beating well after each addition. Lightly spoon 2 1/4 cups flour into dry measuring cups; level with a knife. Combine 2 1/4 cups flour, baking powder, and salt; stir well with a whisk. Add flour mixture to sugar mixture alternately with 1 1/4 cups milk, beginning and ending with flour mixture. Stir in 2 teaspoons vanilla.
Pour batter into prepared pans, and sharply tap pans once on counter to remove air bubbles. Bake at 350° for 30 minutes or until a wooden pick inserted in center comes out clean. Cool in pan 10 minutes on a wire rack; remove from pans. Carefully peel off wax paper; cool completely on wire rack.
Frosting Directions
Combine brown sugar and next 4 ingredients (brown sugar through salt) in a medium saucepan, and bring to a boil over medium-high heat, stirring constantly. Reduce heat, and simmer until thick (about 5 minutes), stirring occasionally. Remove from heat. Add powdered sugar and 2 1/2 teaspoons vanilla; beat at medium speed of a mixer until smooth and slightly warm. Cool 2 to 3 minutes (frosting will be thin but thickens as it cools).
Place 1 cake layer on a plate; spoon 1/2 cup frosting on to cake layer spreading to cover. Top with remaining cake layer. Frost top and sides of cake. Store cake loosely covered in refrigerator.
*Original recipe can be located here or Cooking Light, December 1999 issue.
Eating all of this (plus all of the loser dishes) was a great way to spend a Saturday afternoon/evening with friends. Especially since there was plenty of beer to wash down any non-palatable items.


